# 单节点rancher快速部署
我们知道kubernetes学习成本非常高,如果想要快速体验Paas云平台的话,连部署搭建对于新手来说都是难以下手。

rancher是一个`kubernetes-as-a-service`解决方案,也就是说rancher将kubernetes集群搭建与应用编排实现了打包一体化,可以通过图形界面的操作就可以来部署kubernetes集群与应用了。
参考官网: https://rancher.com/
下面我们来使用容器方式快速部署单节点rancher
## 环境准备
| 系统 | docker版本 | rancher版本 | IP |
| --------- | ---------- | ----------- | -------------- |
| centos7.6 | 19.03.1 | 2.X | 192.168.122.12 |
准备工作:
1, 配置静态IP地址(要求能上公网,因为要拉取镜像)
~~~powershell
# vim /etc/sysconfig/network-scripts/ifcfg-eth0
BOOTPROTO="static"
NAME="eth0"
DEVICE="eth0"
ONBOOT="yes"
IPADDR=192.168.122.12
NETMASK=255.255.255.0
GATEWAY=192.168.122.1
DNS1=192.168.122.1
# systemctl stop NetworkManager
# systemctl disable NetworkManager
# systemctl restart network
# systemctl enable network
~~~
2, 主机名和主机名绑定
~~~powershell
# hostnamectl set-hostname --static rancher
~~~
~~~powershell
# vim /etc/hosts
127.0.0.1 localhost localhost.localdomain localhost4 localhost4.localdomain4
::1 localhost localhost.localdomain localhost6 localhost6.localdomain6
192.168.122.12 rancher
~~~
3, **所有节点**关闭centos7的firewalld防火墙,打开iptables并保存为空规则
~~~powershell
# systemctl stop firewalld
# systemctl disable firewalld
# yum install iptables-services -y
# systemctl restart iptables
# systemctl enable iptables
# iptables -F
# iptables -F -t nat
# iptables -F -t mangle
# iptables -F -t raw
# service iptables save
iptables: Saving firewall rules to /etc/sysconfig/iptables:[ OK ]
~~~
4, **所有节点**关闭selinux
~~~powershell
# vim /etc/selinux/config
# This file controls the state of SELinux on the system.
# SELINUX= can take one of these three values:
# enforcing - SELinux security policy is enforced.
# permissive - SELinux prints warnings instead of enforcing.
# disabled - No SELinux policy is loaded.
SELINUX=disabled 确认为disabled,如果不是请改成disabled(需要reboot重启生效)
# SELINUXTYPE= can take one of three values:
# targeted - Targeted processes are protected,
# minimum - Modification of targeted policy. Only selected processes are protected.
# mls - Multi Level Security protection.
SELINUXTYPE=targeted
~~~
5, **所有节点** 时间同步
~~~powershell
# systemctl restart ntpd
# systemctl enabled ntpd
~~~
## 需要保证安装docker,并启动服务
~~~powershell
# wget https://download.docker.com/linux/centos/docker-ce.repo -O /etc/yum.repos.d/docker-ce.repo
# yum install docker-ce -y
# systemctl restart docker
# systemctl enable docker
~~~
## 配置镜像加速器
~~~powershell
# vim /etc/docker/daemon.json
{
"registry-mirrors": ["https://42h8kzrh.mirror.aliyuncs.com"]
}
# systemctl daemon-reload
# systemctl restart docker
~~~
## 启动rancher
~~~powershell
[root@rancher ~]# docker run -d --restart=unless-stopped -p 80:80 -p 443:443 --name rancher -v /var/lib/rancher/:/var/lib/rancher/ rancher/rancher:stable
~~~
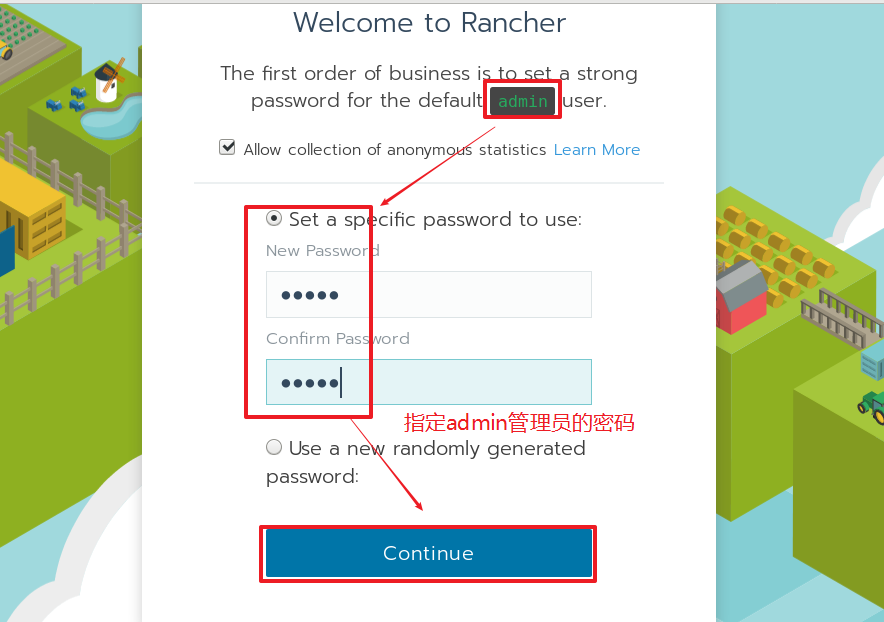
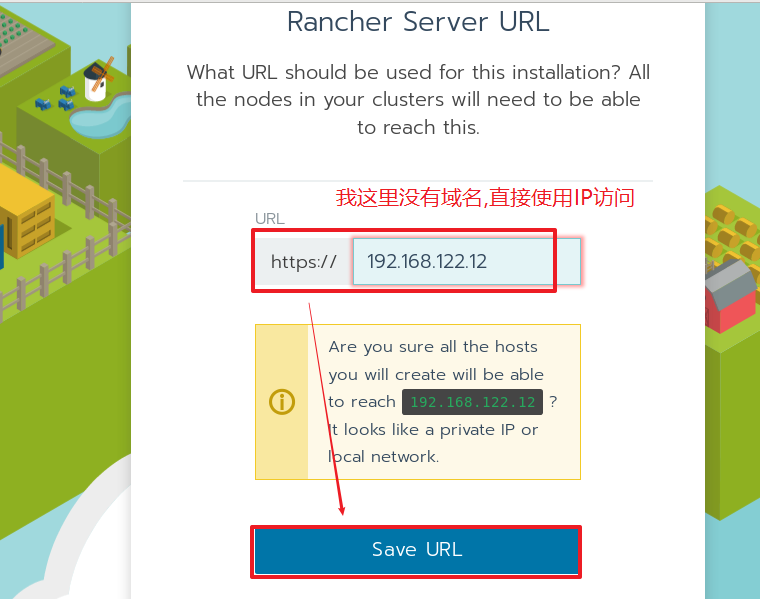
## 通过浏览器访问配置
直接访问节点IP即可: https://192.168.122.12
注意: 因为我们没有配置SSL证书, 所以浏览器会报不安全的连接,如果要对公网使用,建议使用CA认证的证书。
## 添加kubernetes集群
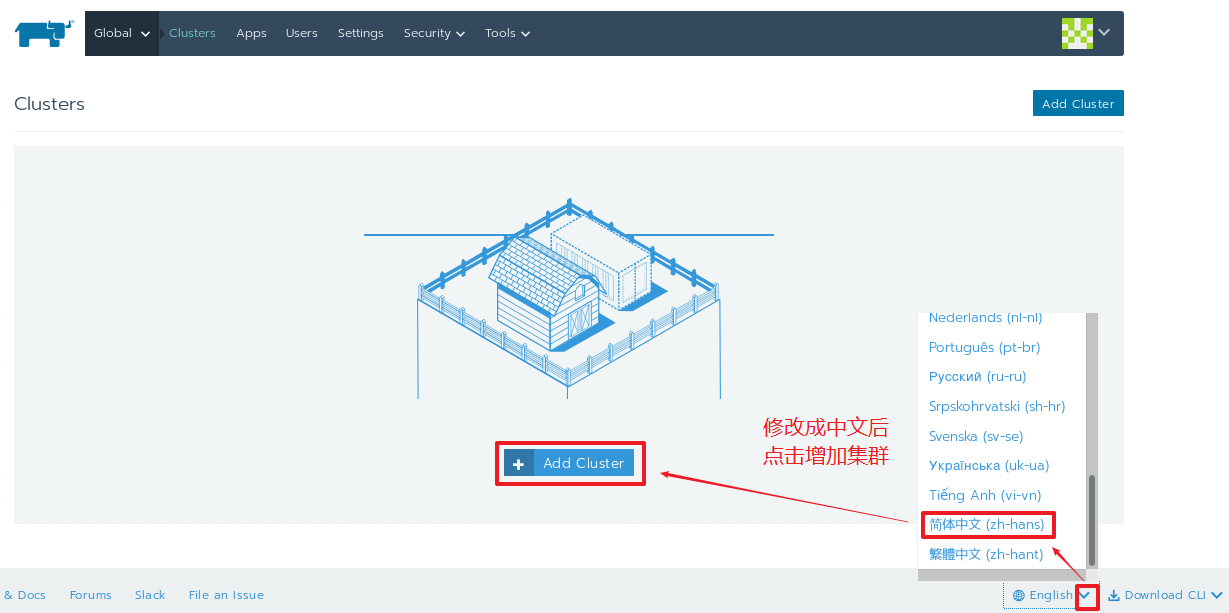
直接在主页面添加集群
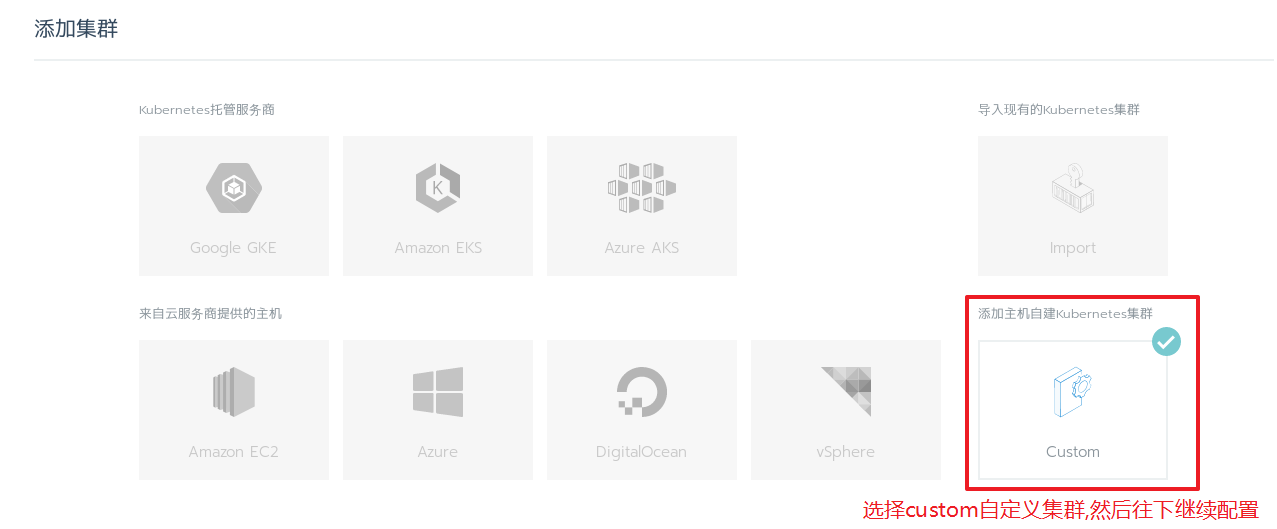
### 选择集群类型
### 集群名称与选项自定义

### 定义集群主机选项
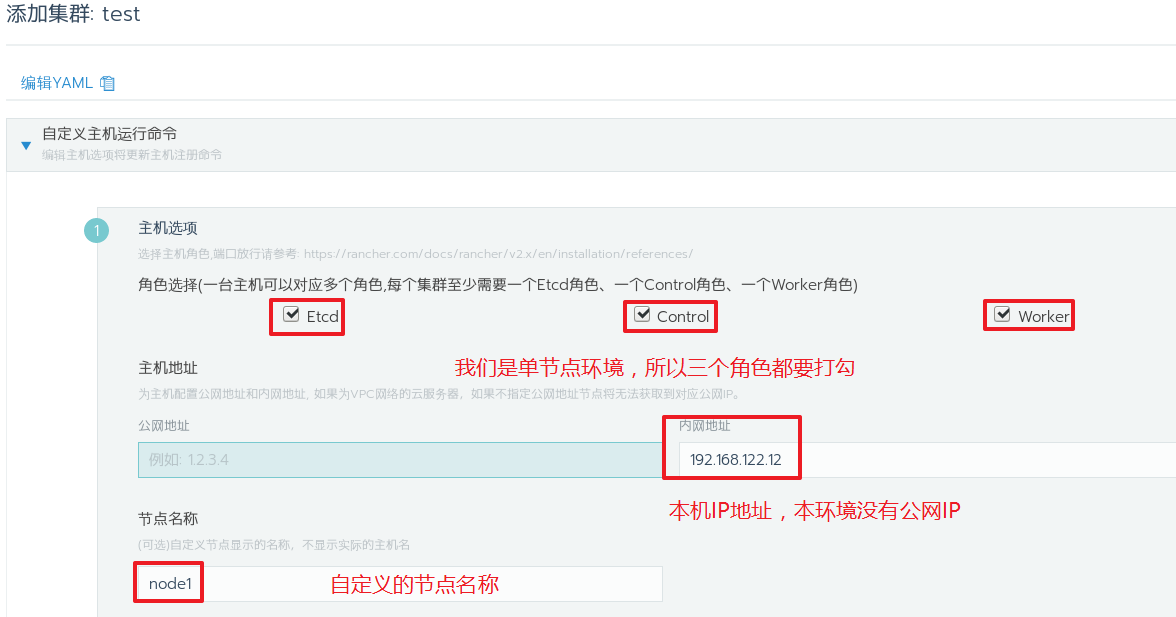
### 安装rancher-agent
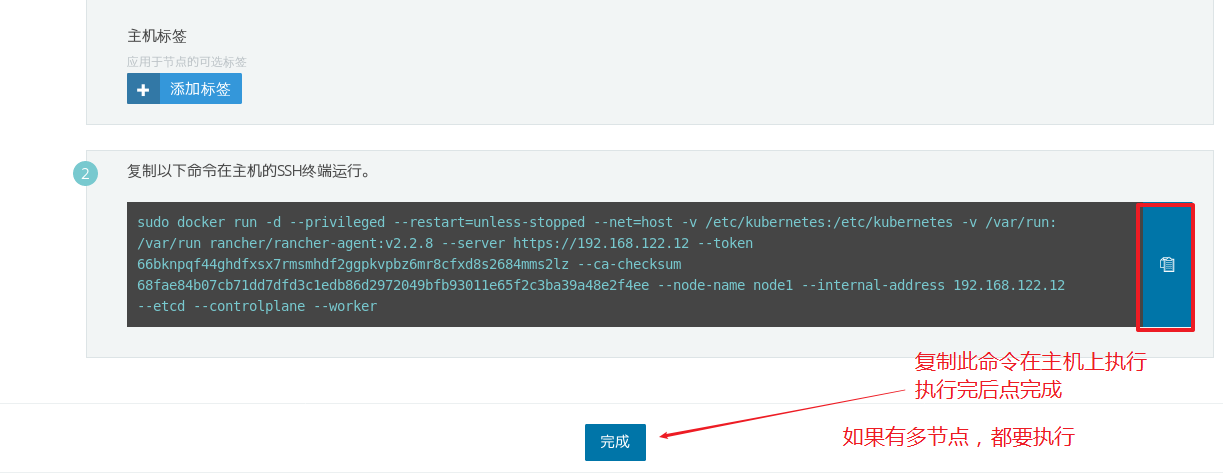
**通过下面命令安装rancher-agent后点完成**
~~~powershell
[root@rancher ~]# sudo docker run -d --privileged --restart=unless-stopped --net=host -v /etc/kubernetes:/etc/kubernetes -v /var/run:/var/run rancher/rancher-agent:v2.2.8 --server https://192.168.122.12 --token 66bknpqf44ghdfxsx7rmsmhdf2ggpkvpbz6mr8cfxd8s2684mms2lz --ca-checksum 68fae84b07cb71dd7dfd3c1edb86d2972049bfb93011e65f2c3ba39a48e2f4ee --node-name node1 --internal-address 192.168.122.12 --etcd --controlplane --worker
~~~


 AI运维
AI运维 微短剧拍摄剪辑
  IP短视频
IP短视频 C/C++
C/C++ 狂野架构师
狂野架构师 AI智能应用开发
 AI大模型开发(Python)
 AI鸿蒙开发
 AI嵌入式+机器人开发
 前端开发
前端开发 AI大数据开发
 AI运维
AI运维 AI测试
AI测试 AI设计
AI设计 AI视频创作与直播运营
 C/C++
C/C++ 产品经理
产品经理 拍摄剪辑+短视频制作
 PMP项目管理认证
 电商运营
电商运营 Go语言与区块链
 大数据
大数据 PHP工程师
 Android+物联网
 iOS
iOS .NET
.NET


